
Last updated September 3, 2026
Air Duct Cleaning Maintenance Checklist for Chicago Homeowners
A checklist that tells you to “clean your ducts every 3–5 years” is nearly useless without context. The real question is: what happened in your home — or on your block — in the last 12 months that moved that timeline up? Chicago homeowners face a specific combination of pressures that most generic duct-cleaning guides never mention: basement moisture events after heavy spring thaw, gut-rehab construction dust from neighboring greystone renovations, seasonal HVAC switchovers that disturb settled debris, and winters that force systems to run hard for five straight months. This guide organizes maintenance around the triggers that actually accelerate duct degradation in Chicago — not a calendar someone invented. For a deeper dive, see The Complete Guide to Air Duct Cleaning in Chicago.
Quick Answer
Chicago homeowners should inspect their air ducts at least twice a year — at HVAC switchover in spring and fall — and schedule professional cleaning whenever a qualifying event occurs: basement flooding, nearby construction, a new pet, HVAC replacement, or visible mold or debris at registers. Most Chicago homes need our Air Duct Cleaning services every 2–4 years, not the generic “3–5 year” national recommendation, because of the city’s humidity swings, older housing stock, and heavy particulate seasons.
Table of Contents
- Why Chicago’s Climate and Housing Stock Change the Rules
- Event-Based Triggers That Override Any Calendar Schedule
- Your Seasonal Walk-Through Inspection Routine
- How to Track Filters and Airflow as an Early Warning System
- Basement Mechanical Room Warning Signs Every Chicago Homeowner Should Know
- What to Document Before a Pro Arrives — and Why It Saves You Money
- The Full Annual Maintenance Checklist
- Common Mistakes to Avoid
- When to Call a Professional
- Frequently Asked Questions
- The Bottom Line
Why Chicago’s Climate and Housing Stock Change the Rules
National duct-cleaning guidelines are written for a statistical average home in a statistical average climate. Chicago is neither. A few things set Chicago apart from those averages in ways that directly affect your ductwork:
- Humidity swings: Chicago’s relative humidity can swing from below 20% in a dry January to over 80% on a July afternoon. That range stresses duct seals and creates condensation points — especially in basement plenum sections — where mold spores find the moisture they need to colonize.
- Older housing stock: Large portions of Bridgeport, Logan Square, Pilsen, and Beverly are built on pre-1970 construction. Many of these homes have original flex duct or galvanized steel runs that have never been professionally cleaned. Decades of accumulated debris in older systems isn’t unusual — we’ve pulled material out of ducts that told the history of three families.
- High-density neighborhoods: When the coach house two doors down undergoes a full gut rehab, your HVAC intake doesn’t know to close. Construction particulate — drywall dust, insulation fibers, demolition debris — travels in Chicago’s prevailing southwest winds and finds its way into return air intakes regularly, particularly on the Northwest Side and in Wicker Park, where renovation density is high.
- Long heating seasons: Chicago’s heating season runs from roughly October through April — about six months of continuous furnace operation. That’s six months of the same air recirculating through your system, depositing particulate layer by layer. By April, a system that looked clean in September may have measurably reduced airflow.
These aren’t scare tactics. They’re the operating conditions that should shape your maintenance decisions.
Event-Based Triggers That Override Any Calendar Schedule
Calendar-based cleaning schedules assume your home’s conditions stay roughly constant year over year. They don’t. Certain events inside or near your home reset the contamination clock regardless of when your last cleaning was. Here are the triggers that should prompt an immediate inspection — and likely a professional cleaning:
- Basement flooding or significant moisture intrusion: Chicago’s sewer system backs up. Flash flooding after summer storms is a regular event in South Shore, Garfield Ridge, and parts of the Northwest Side. When water reaches your basement mechanical room, it doesn’t need to touch the ductwork directly to cause problems — elevated ambient humidity following a flood event is enough to accelerate mold growth inside return air plenums located at floor level.
- Gut rehab on your property or an adjacent property: Opening walls, removing plaster, or disturbing original insulation releases decades of settled particulate. Even with containment sheeting, fine particles recirculate through HVAC systems within 24–48 hours. A return air register with an old, low-MERV filter is essentially an open door.
- HVAC system replacement: When a furnace or air handler is swapped out, the ductwork gets disturbed, re-connected, and in some cases partially re-run. That process shakes loose years of debris that had been sitting undisturbed. Installing a new system into uncleaned ductwork is one of the more common things we see — and it shortens the life of the new equipment.
- A new pet, especially multiple pets: Pet dander is extremely fine and recirculates through ductwork efficiently. Within 90 days of adding a dog or cat, a noticeable layer of dander has typically built up on supply register interiors and inside the air handler cabinet.
- A household member developing new allergy or respiratory symptoms: If someone in the home develops unexplained symptoms that improve when they leave the house, that’s a signal worth investigating before attributing it to anything else.
- Extended vacancy followed by reoccupancy: Homes that sit vacant for a season — rental turnovers, estate situations, post-renovation moves — often have systems that sat dormant. When those systems restart, whatever settled in the ducts goes airborne immediately.
Your Seasonal Walk-Through Inspection Routine
Between professional cleanings, homeowners can do a meaningful visual inspection twice a year: once in late April when you switch from heat to cooling, and once in early October when you switch back. This isn’t a substitute for professional equipment — a Rotobrush or Nikro extraction system reaches places no homeowner can — but it gives you data. Here’s how to do it:
Spring Switchover Inspection (Late April)
- Remove the cover from three to five supply registers throughout the house, including at least one on each floor. Use a flashlight or your phone camera to look inside. You’re checking for visible dust accumulation (a thin gray coating is normal; a thick dark mat is not), standing moisture or rust staining on the duct wall, and any debris that has fallen inside.
- Check your return air grilles — the larger ones, typically in hallways or main living areas. Dust accumulation on the grille itself is normal and easy to clean. Dust caked on the inside of the duct boot behind the grille, especially combined with discoloration, warrants a closer look.
- Go to your air handler or furnace and look at the condition of the cabinet interior and the blower compartment. If you can see the blower wheel, check whether the fins are coated in gray fuzz — that’s a sign particulate is bypassing your filter.
- Replace your filter and note the date. Compare the condition of the removed filter to the one from the previous fall switchover. If it’s dramatically darker or heavier, your system worked harder this winter than expected.
- Check for any new cracks, gaps, or disconnected sections in accessible duct runs — especially flex duct in attic or crawl space areas, which can sag or disconnect at joints over a winter.
Fall Switchover Inspection (Early October)
- Repeat the register and return grille inspection from spring. Pay particular attention to any registers that served rooms with dehumidifiers or windows open during summer — those are higher-risk for mold introduction.
- Before you run heat for the first time, run the fan-only setting for 15–20 minutes with windows open. This clears out any debris that settled over summer without recirculating it at full heat.
- Check the condition of any insulated duct wrap in your basement or mechanical room. Look for tears, compression, or moisture staining on the outside of the insulation. Wet insulation on a supply duct is a condensation problem that won’t resolve on its own.
- Replace your filter again. Note whether airflow from registers feels notably weaker than it did in spring. Reduced airflow on a clean filter change points to accumulation inside the duct runs or at the air handler.
How to Track Filters and Airflow as an Early Warning System
Your HVAC filter is the most accessible diagnostic tool in your home. Most homeowners treat it as a consumable — replace it and forget it. Treating it as a data point instead gives you a running record of your system’s condition over time.
Here’s a simple tracking method that takes less than two minutes per filter change:
- Date and MERV rating on each filter: Write the installation date directly on the filter’s cardboard frame with a marker. When you remove it, write the removal date. Over time you’ll see whether filters are loading up faster than they should — a filter that normally lasts 60 days lasting only 30 is telling you something changed.
- Take a photo of every removed filter: Keep them in a phone album. The visual comparison between a filter pulled in January 2024 and one pulled in January 2025 can show a meaningful change in loading pattern or color that would be invisible if you’re just discarding each one.
- Note where the loading is heaviest: If a filter is darkest at one corner or one edge, that indicates uneven airflow — possibly from a partially blocked duct, a disconnected section, or a duct leak that’s drawing in bypass air. That’s worth noting for a technician.
- Track airflow subjectively at your registers: You don’t need instruments. Once a season, hold your hand in front of each supply register with the system running. Rooms that used to feel well-supplied and now feel weak are flagging a problem in that branch run. Note which rooms and share that with your technician before they arrive.
Chicago homeowners in older two-flat and three-flat conversions — common in Avondale, Lakeview, and Humboldt Park — often have extended duct runs with multiple 90-degree elbows that accumulate debris faster than single-family homes with shorter, straighter runs. The filter-tracking method is especially useful in these buildings.
Basement Mechanical Room Warning Signs Every Chicago Homeowner Should Know
In most Chicago homes, the furnace, air handler, and main duct trunk lines live in the basement. That’s also where Chicago’s moisture problems concentrate. Here are the specific things to look for when you walk through your mechanical room — these are signs that contamination has already migrated, or is about to:
- White or gray efflorescence on basement walls near the plenum: Mineral deposits from water migration through masonry. Where water moves, air moves. If you see this near your return air plenum, your return is likely pulling basement air — and whatever’s in it.
- Dark staining or discoloration on the exterior of duct connections: Particularly at the junction between the furnace cabinet and the main trunk. This pattern — sometimes called “ghosting” — indicates air is leaking at the joint, which means contaminated air is entering the system at that point rather than going through the filter first.
- Rust on the lower section of the furnace cabinet or on floor-level duct boots: Not just cosmetic. Rust on the interior of metal ductwork creates surface irregularities that trap particulate more aggressively than smooth metal.
- A musty or earthy odor when the system first starts in fall: That smell is biological — mold or bacteria burning off the heat exchanger or duct walls. It should dissipate within a few minutes on first run. If it persists beyond 10 minutes of operation or returns every time the system starts, it’s a symptom of active growth somewhere in the system.
- Insulation that has fallen off flex duct connections or trunk line joints: Exposed metal in an unconditioned basement creates condensation points in summer. Condensation inside an air duct creates exactly the moisture environment that mold requires.
- Any standing water or water marks within six feet of the air handler: Even a minor sump failure or floor drain backup can elevate humidity in the mechanical room to levels that promote duct contamination within 48–72 hours.
What to Document Before a Pro Arrives — and Why It Saves You Money
A well-documented system is faster to assess, which means less diagnostic time on your bill and more actionable results from the visit. Here’s what to prepare before a technician arrives:
- Date of last professional duct cleaning (if known). If you have paperwork, have it accessible. If you don’t know the date, say so — it affects which cleaning protocol is appropriate.
- Date of last filter change and the MERV rating of the filter you’re using. A MERV-8 filter and a MERV-13 filter tell the technician different things about your system’s load.
- Photos of any register interiors or duct sections you inspected. Even blurry phone flashlight shots help a technician prioritize where to start.
- A written note of which rooms have weaker-than-normal airflow and when you first noticed the change. “The back bedroom on the second floor has been weak since we had the bathroom redone in March” is specific enough to direct attention to a likely cause.
- Any moisture events in the past 24 months: basement flooding, roof leaks above a supply plenum, plumbing leaks inside walls adjacent to duct runs. Even if the water issue was resolved, the ductwork may not have dried out fully.
- The make and approximate age of your furnace/air handler. Equipment age affects duct geometry, access points, and the appropriate cleaning method. A 1998 furnace in a Bridgeport bungalow has different requirements than a 2019 variable-speed system in a Lincoln Square gut rehab.
When Ronald Cooper arrives at a job with this kind of documentation already in hand, the diagnostic phase is shorter, the cleaning scope is clearer, and the homeowner understands exactly what was found and why it was addressed. That’s not a sales pitch — it’s just how professional work flows better with prepared clients.
The Full Annual Maintenance Checklist
Use this checklist as your running reference. Print it, save it, or add it to your home maintenance folder. The items are organized by trigger and season, not just calendar date.
Every Filter Change (Every 30–90 Days Depending on Conditions)
- Write installation and removal dates on filter frame
- Photograph the removed filter before discarding
- Note whether the filter loaded faster or slower than the previous cycle
- Check the filter slot for bypass gaps — light should not be visible around the filter edges
- Confirm filter MERV rating is appropriate for your system (consult equipment manual; higher MERV is not always better for older systems with lower static pressure tolerance)
Spring (Late April — Before First AC Use)
- Inspect 3–5 supply registers with flashlight
- Inspect return air grilles — remove and clean grille face, check duct interior
- Check blower wheel for debris accumulation
- Walk the basement mechanical room for moisture staining, rust, insulation damage, and air leak signs at duct joints
- Replace filter; compare to previous filter photo
- Test airflow at each room register with fan running; note any weak zones
- Check condensate drain line on AC coil — clear it before cooling season begins
Fall (Early October — Before First Heat Use)
- Repeat spring register and return inspection
- Run fan-only mode for 15–20 minutes with windows open before first heat cycle
- Check insulated duct wrap for tears, compression, or moisture staining
- Replace filter; note airflow changes since spring
- Check basement for any new moisture evidence since last inspection
- Test heating at each register; note any rooms slower to warm than others
After Any Qualifying Event (No Waiting for a Scheduled Season)
- Document the event with photos and dates
- Inspect nearest registers to the event source within 48–72 hours
- Replace filter immediately following construction, flooding, or HVAC work
- If basement flooding occurred, run a dehumidifier in the mechanical room and re-inspect duct insulation after 72 hours
- Schedule professional inspection if event falls into any of the six trigger categories listed earlier in this guide
Common Mistakes to Avoid
- Using a high-MERV filter without confirming your system can handle the increased static pressure. A MERV-13 filter on an older furnace not rated for it can starve the blower of airflow, causing it to overheat and pull dirty bypass air around the filter. Check your furnace documentation or ask a technician before upgrading filter ratings.
- Assuming the previous homeowner had the ducts cleaned. In Chicago’s active real estate market — particularly in neighborhoods like Ukrainian Village and Bronzeville where older properties turn over frequently — we regularly encounter homes where the new owner assumed the ducts were recently serviced. There’s rarely documentation, and the evidence inside the ducts tells a different story.
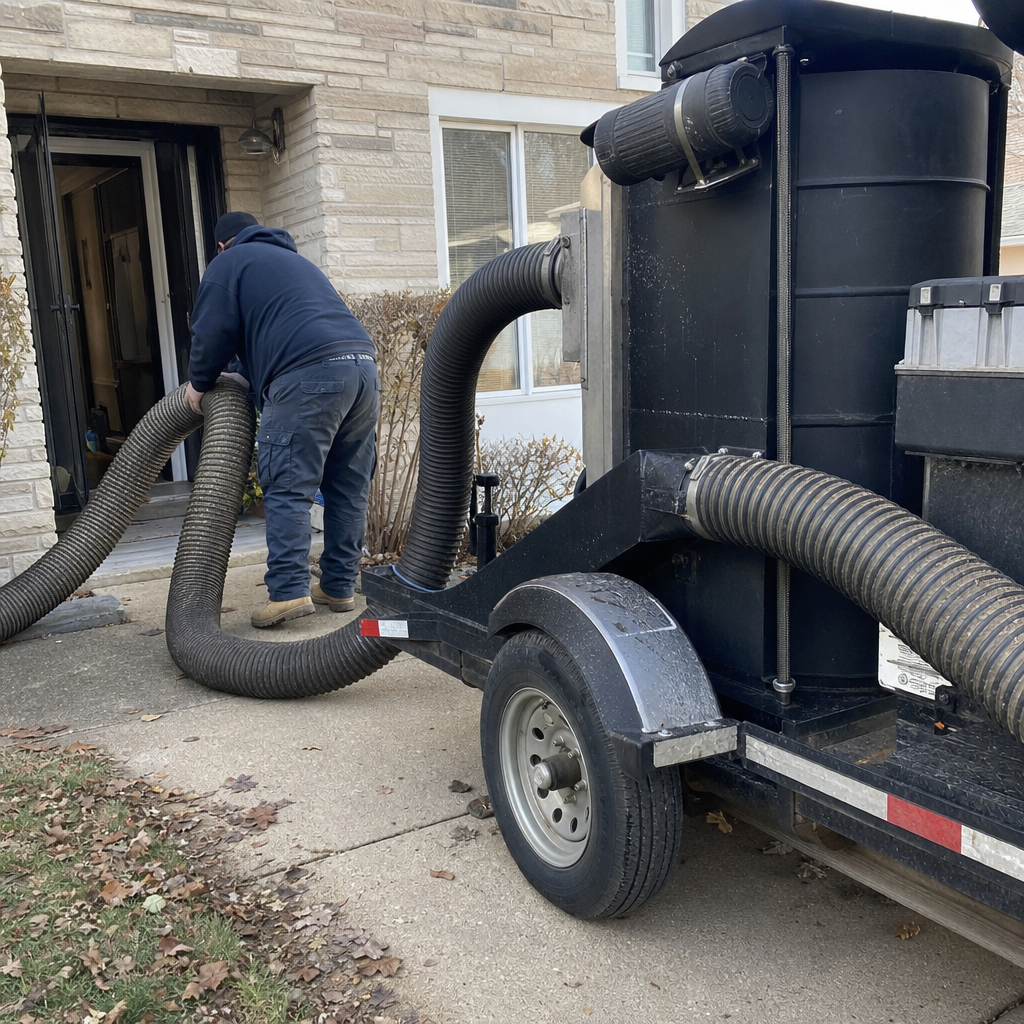
- Hiring a low-bid cleaner who uses a consumer-grade shop vac rather than professional extraction equipment. Consumer equipment doesn’t generate the negative pressure needed to dislodge debris from duct walls. You’ll get a cleaner register face and nothing else. Professional-grade systems like the Rotobrush and Nikro platforms used by Anchor Air Duct Cleaning create the agitation and extraction pressure needed to actually clean the duct interior — not just the accessible surface.
- Skipping duct cleaning after HVAC replacement. A new furnace or air conditioner installed in uncleaned ductwork immediately begins circulating debris through the new system. Heat exchangers and evaporator coils that get coated in debris early in their service life run less efficiently and fail sooner. It’s one of the most preventable forms of equipment damage we see.
- Treating duct sanitizing as a substitute for mechanical cleaning. Chemical sanitizers — including products from Abatement Technologies — are effective at treating biological contamination after the mechanical debris has been removed. Applying sanitizer to a duct that hasn’t been cleaned first is like painting over a dirty wall. The biology you’re treating is protected by the layer of debris underneath it.
- Waiting for a visible problem before scheduling an inspection. By the time debris is falling from registers or odors are persistent, contamination is typically well-advanced. The purpose of this checklist is to catch problems at the early-warning stage — when a professional cleaning is straightforward — rather than at the crisis stage, when it isn’t.
- Not documenting event-based triggers when they happen. Chicago homeowners who experience a basement flood in July and don’t schedule a duct inspection until October are bringing a technician into a situation where any moisture damage has had three months to develop. Date your observations in real time.
When to Call a Professional
Call for a professional inspection — not just a DIY walk-through — when any of the following apply:
- Visible mold, dark biological staining, or persistent musty odor at registers or from the air handler
- Basement flooding that reached or approached the mechanical room
- Renovation work completed anywhere on the property — demo, drywall, insulation
- Airflow noticeably weaker in one or more rooms after a clean filter change
- A new HVAC system was installed without concurrent duct cleaning
- The home is newly purchased and duct cleaning history is unknown
- Household members experiencing respiratory symptoms that correlate with time spent inside
For Chicago homeowners who want a professional assessment they can trust, Anchor Air Duct Cleaning Service Greater Chicago offers free estimates — call (833) 223-3823 to schedule. Ronald Cooper leads every inspection personally, and the diagnosis is based on what’s actually found in your system, not a pre-set package.
Frequently Asked Questions
Most Chicago homes benefit from professional cleaning every 2–4 years — shorter than the national average of 3–5 years — because of the city’s humidity swings, long heating seasons, and older housing stock. Homes that have experienced qualifying events (flooding, renovation, new pets, HVAC replacement) should schedule cleaning regardless of when the last service was. Before you book, check Air Duct Cleaning Permits, Codes & Inspections in IL: What You Need to Know. Call (833) 223-3823 for a free estimate if you’re unsure where your home falls.
You can clean the visible portion of your registers and the first few inches of duct boot — that’s worth doing between professional services. But consumer equipment doesn’t generate the sustained negative pressure needed to dislodge and capture debris further into the duct run. Professional systems like the Rotobrush platform use rotating brushes combined with simultaneous high-CFM extraction to clean the full length of duct, which a shop vac physically cannot replicate.
Biological contamination — mold or bacteria — typically smells musty, earthy, or like a damp basement. Dust accumulation alone rarely produces a strong odor until the system heats it, at which point it can smell like burning dust at the start of the heating season. A persistent odor that returns every time the system runs, rather than dissipating after 5–10 minutes, is the more significant warning sign.
Standard residential air duct cleaning in Chicago does not require a permit. However, if duct cleaning reveals conditions that require duct repair, re-sealing, or replacement of sections, those repairs may fall under HVAC mechanical permit requirements depending on scope. A licensed contractor can tell you at the time of inspection whether any discovered conditions trigger a permit requirement. Anchor Air Duct Cleaning handles HVAC Cleaning in Chicago Lawn and related services and can identify whether follow-on repairs would require a separate licensed HVAC contractor.
Professional air duct cleaning in Chicago typically ranges from $300–$600 for a standard single-family home, depending on system size, number of vents, accessibility, and condition. Homes with significant contamination, mold treatment needs, or duct repair requirements will fall at the higher end or require additional service scope. Be cautious of quotes under $150–$200 — that price point almost always reflects consumer-grade equipment or a bait-and-switch upsell model. Call (833) 223-3823 for a free, scope-specific estimate.
They’re separate systems with separate risks. Air duct cleaning addresses the HVAC distribution system — supply and return air pathways throughout your living space. Dryer Vent Cleaning in Chicago Lawn addresses the exhaust duct from your dryer to the exterior of the home. Lint accumulation in dryer vents is a leading cause of residential fires, entirely separate from air quality concerns. Both should be maintained, but on different schedules — dryer vents typically need cleaning annually or every 18 months, more frequently in households with heavy laundry use.
The Bottom Line
Chicago’s climate, housing stock, and seasonal patterns make generic national duct-cleaning timelines a poor fit for most homeowners here. The checklist in this guide is built around what actually drives duct degradation in Chicago: moisture events, construction particulate, HVAC switchovers, and long heating seasons. The most important habit you can build is event-based awareness — knowing which things that happen in or near your home should trigger an inspection, regardless of when your last cleaning was. Document what you observe, track your filters over time, walk your mechanical room twice a year, and call a professional when the signs point to something beyond a register wipe-down. That’s the maintenance discipline that keeps Chicago homes breathing cleanly year after year. For a free assessment from Air Duct Cleaning in Chicago Lawn or anywhere in the greater Chicago area, call Anchor Air Duct Cleaning at (833) 223-3823.
Written by Ronald Cooper, Owner & Lead Technician at Anchor Air Duct Cleaning Service Greater Chicago, serving Chicago since 2015. Looking for more guides & resources?